As you may know by now, this site is hosted on GitHub Pages. There is no limit to how many “sites” you can host on GitHub Pages if you use the project pages method, but the by default, the URL of your site would be either http://USER_NAME.GitHub.io or (if you’re using project pages) http://USER_NAME.GitHub.io/SITE_NAME. Which is totally cool if you ask me, but sometimes, we’d like to have our own custom domain name that we paid for with our own hard-earned cash.
After some googling to compare domain name registrars, I settled on Namesilo, largely because they’re one of the cheapest around, and honestly I haven’t had any trouble with them. Switching nameservers was simple, whois privacy is free, that’s about all I need actually. I’ve bought 3 domain names through them thus far and don’t plan on switching to anyone else anytime soon.
Normally the documentation on GitHub is a cinch to follow along, but somehow the setting up of custom domains tutorial just flew over my head. The first time I tried it, I ended up on a roundabout link journey between Setting up a custom domain with GitHub Pages, Tips for configuring a CNAME record with your DNS provider and About custom domains for GitHub Pages sites. I seriously think this a problem with me, not GitHub.
I also wanted to use Cloudflare with my site, but in retrospect, this actually simplified things. If you have never heard of Cloudflare and would like to find out more, you can check out this blog post by the Cloudflare team explaining just that. Full disclosure, I never actually got the custom domain to work right just through Namesilo.
So, the second time I had to do this, I distilled the steps down to the following:
-
Create a CNAME file and upload it to your gh-pages repository.
To do this, open your favourite text editor, type in the bare subdomain for your custom domain. There would be one line in that file like so:
www.chenhuijing.comSave the file as
CNAMEwithout any extensions behind it. - Go to Cloudflare and create an account, if you haven’t got one already.
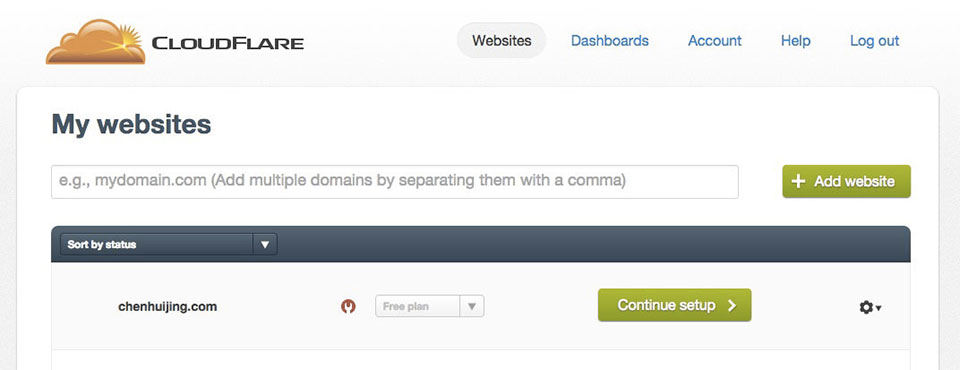
- Enter your domain name then click on the green Add Website green button. Cloudflare will then proceed to scan your domain records. It’ll take about a minute (or so says the progress bar), and when it’s done, just click Continue setup.
-
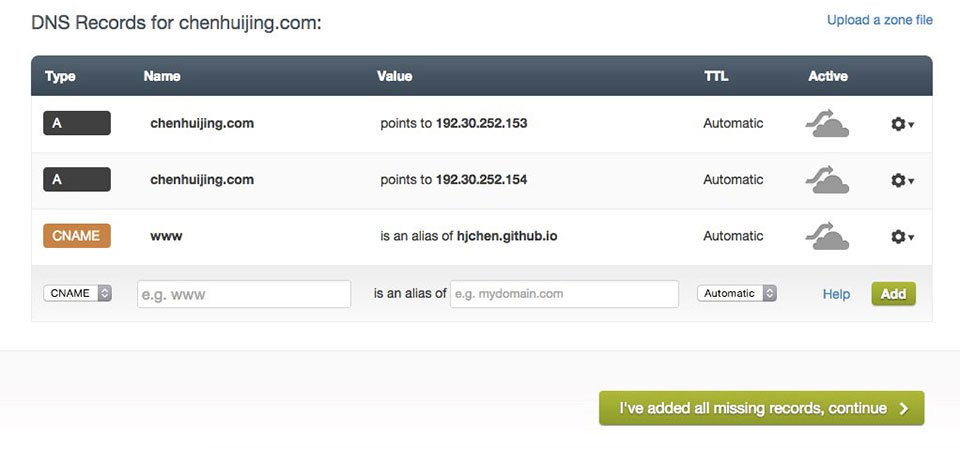
Edit the records so there are two A records which resolve to the following IP addresses:
192.30.252.153
192.30.252.154
Then, add a CNAME record with www as an alias of YOUR_USER_NAME.github.io.
- Cloudflare will then tell you to change your nameservers and because they scanned your domain records, they also helpfully tell you exactly what to do.
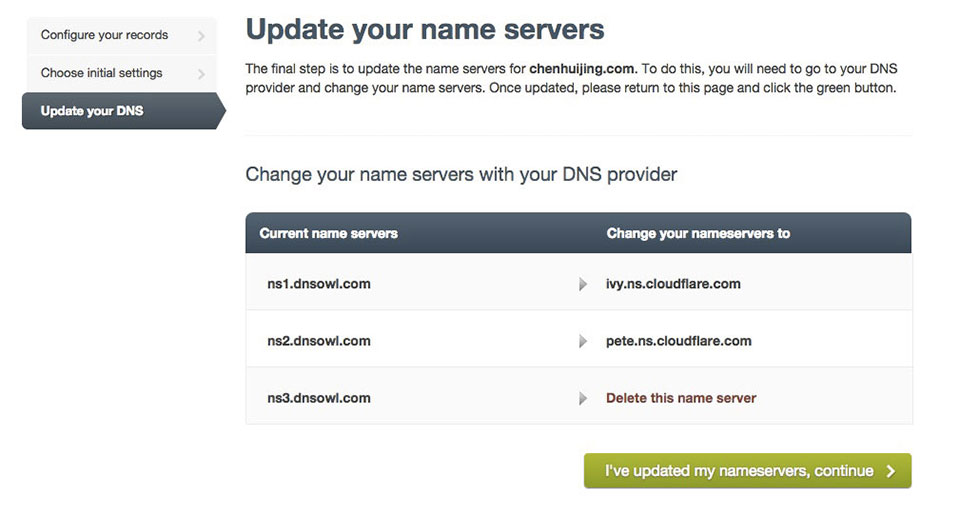
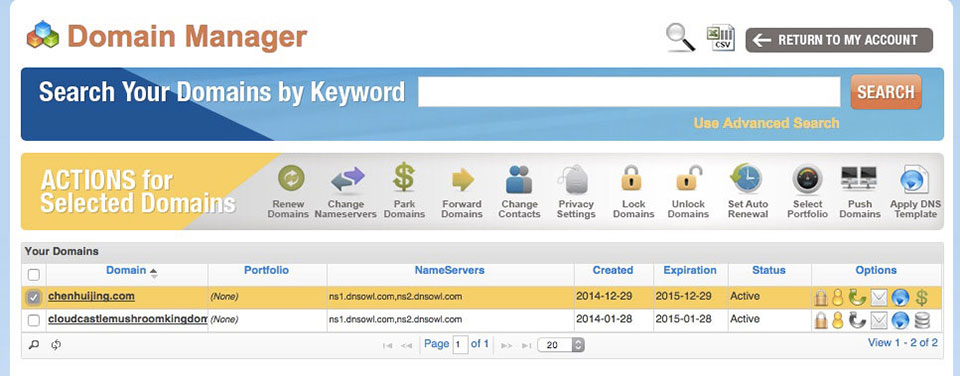
- Now you’ll have to do some twiddling on your Namesilo account. Login and go to the Domain Manager. Select the domain name you’re setting up and click on Change Nameservers.
- Change the nameservers according to the instructions provided by Cloudflare and click on Submit. You should see a message telling you that name server changes will take anything from an hour to 2 days to take effect. Mine took probably an hour, I’m not sure, I went out for dinner.

- If you tried to access your domain before you set up all this, you may end up staring at Namesilo’s parked domain page even after 2 days, so remember to clear your browser cache before checking again.
Update:
Thanks to Jordan Parra for pointing out a typo in the IP addresses (already corrected above). The correct IP addresses are 192.30.252.153 and 192.30.252.154, as per GitHub documentation.